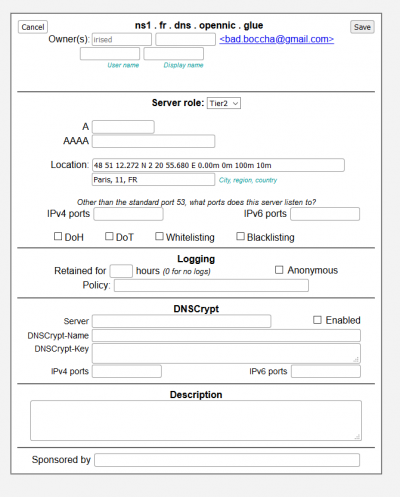
List your server on servers.opennic.org
After setting up and making sure your DNS server is operational, it's now time to list it! Announce it on IRC or the mailing list so everyone is kept informed.
As a last minute check, make sure that your logging and security settings are tuned correctly.
Listing your server
If everything is ready, go to https://servers.opennic.org/ and login by clicking on the “Log in” button in the top-right corner. If you don't have an account yet, register for one and then come back.
Now that you're logged in, the “Add new server” button is now available in the top-left corner. Click it and follow the instructions. You'll need basic DNS server information such as its IP address, supported features (DoT, DoH, DNScrypt, etc…), log policy and location.
The server will be approved manually by an admin, so you should tell other OpenNIC members about your new server on IRC or the mailing list.
If something doesn't work or you need help, contact Shdwdrgn on IRC.
INFO: Editing might be buggy so try to get most of the info right when you first register your server.
Disabled and pending deletion servers
You can disable 1) the server if you need to do some maintenance.
Servers that fail to work properly will be automatically moved to the deletion queue after 48 hours. From the bottom-text on servers.opennic.org:
Servers which are offline or fail testing for more than 48 hours will be automatically moved to a “pending deletion” status. If you resolve the issue and wish to have your server re-listed, please ask a Tier-0 operator to update the status.
Tier 0 operators are the OpenNIC core team.
